Quick Start
To quickly experience FlowGram.AI, you can directly open it in CodeSandbox or open it in StackBlitz.
Choose a way to start:
- Option 1: Use the official template scaffolding to build a new project (⭐️ Recommended for a quick start).
- Option 2: Integrate into an existing project by installing the editor package.
Option 1: Create a FlowGram.AI Application via the Official Template
- Use the FlowGram CLI to set up a runnable demo.
- Select a template when prompted (it is recommended to choose
Free Layout Demofor a quick start).
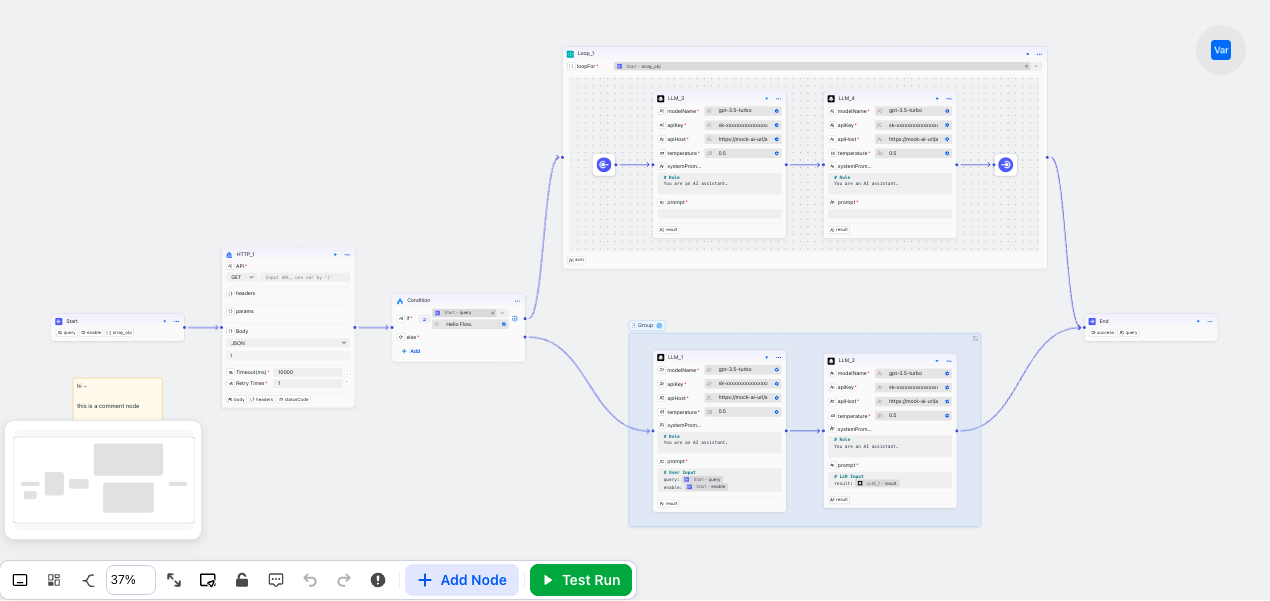
Free Layout Demo View Online Demo
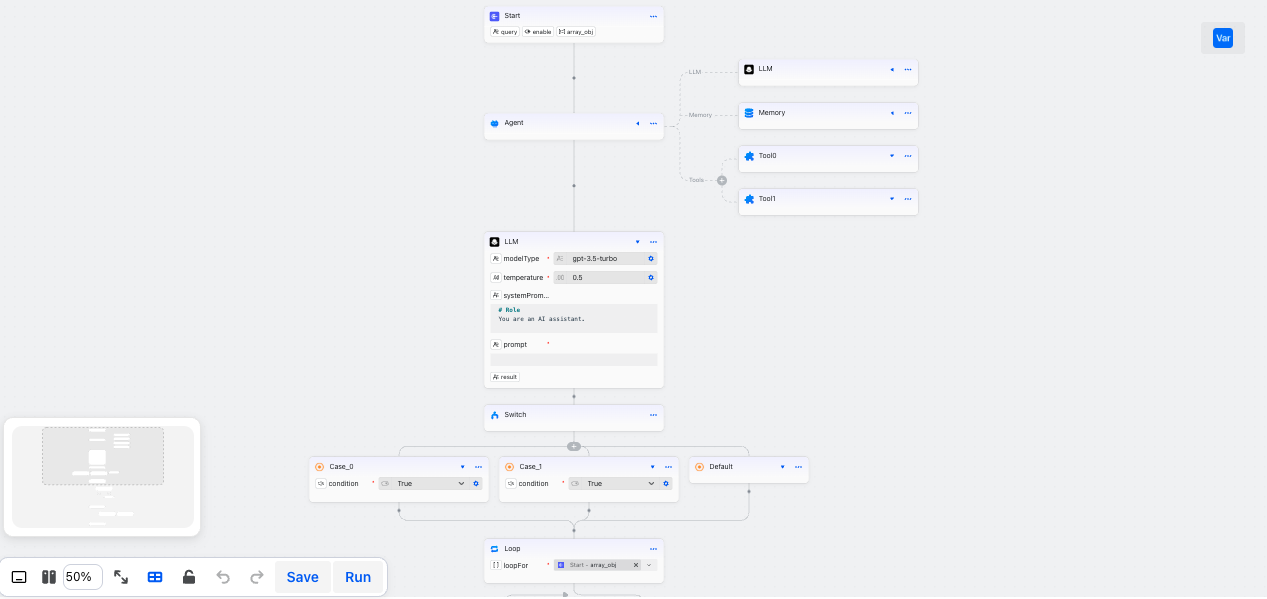
Fixed Layout Demo View Online Demo
Free Layout Demo Simple View Online Demo
Fixed Layout Demo Simple View Online Demo
- Check the installed directory name.
- For a project created with the Free Layout Demo template, the directory name is
demo-free-layout. - For a project created with the Free Layout Demo Simple template, the directory name is
demo-free-layout-simple. - For a project created with the Fixed Layout Demo template, the directory name is
demo-fixed-layout. - For a project created with the Fixed Layout Demo Simple template, the directory name is
demo-fixed-layout-simple.
- Enter the project directory.
- Install dependencies.
- Start the development server.
Option 2: Install the Editor Package Directly
This method is suitable for developers who have some familiarity with the FlowGram project.
If you are new to FlowGram, we recommend choosing Option 1 first to familiarize yourself with the project, and then gradually integrate the required code into your existing project.
If you need to add the package to an existing project, choose a layout type:
Nodes can be dragged freely on the canvas, and edges can be used to connect nodes to establish logical relationships between them.
Next: Create a Free Layout Canvas
The position of nodes in the graph represents the logical relationship between them.
Next: Create a Fixed Layout Canvas
